Intro :
This page provides a guide to how to start working with Arduino. It is focused on using the Arduino Nano 33 BLE Sense board with the intention of using this for Machine Learning.
However, the steps for board setup, verify and upload are the same for any Arduino board.
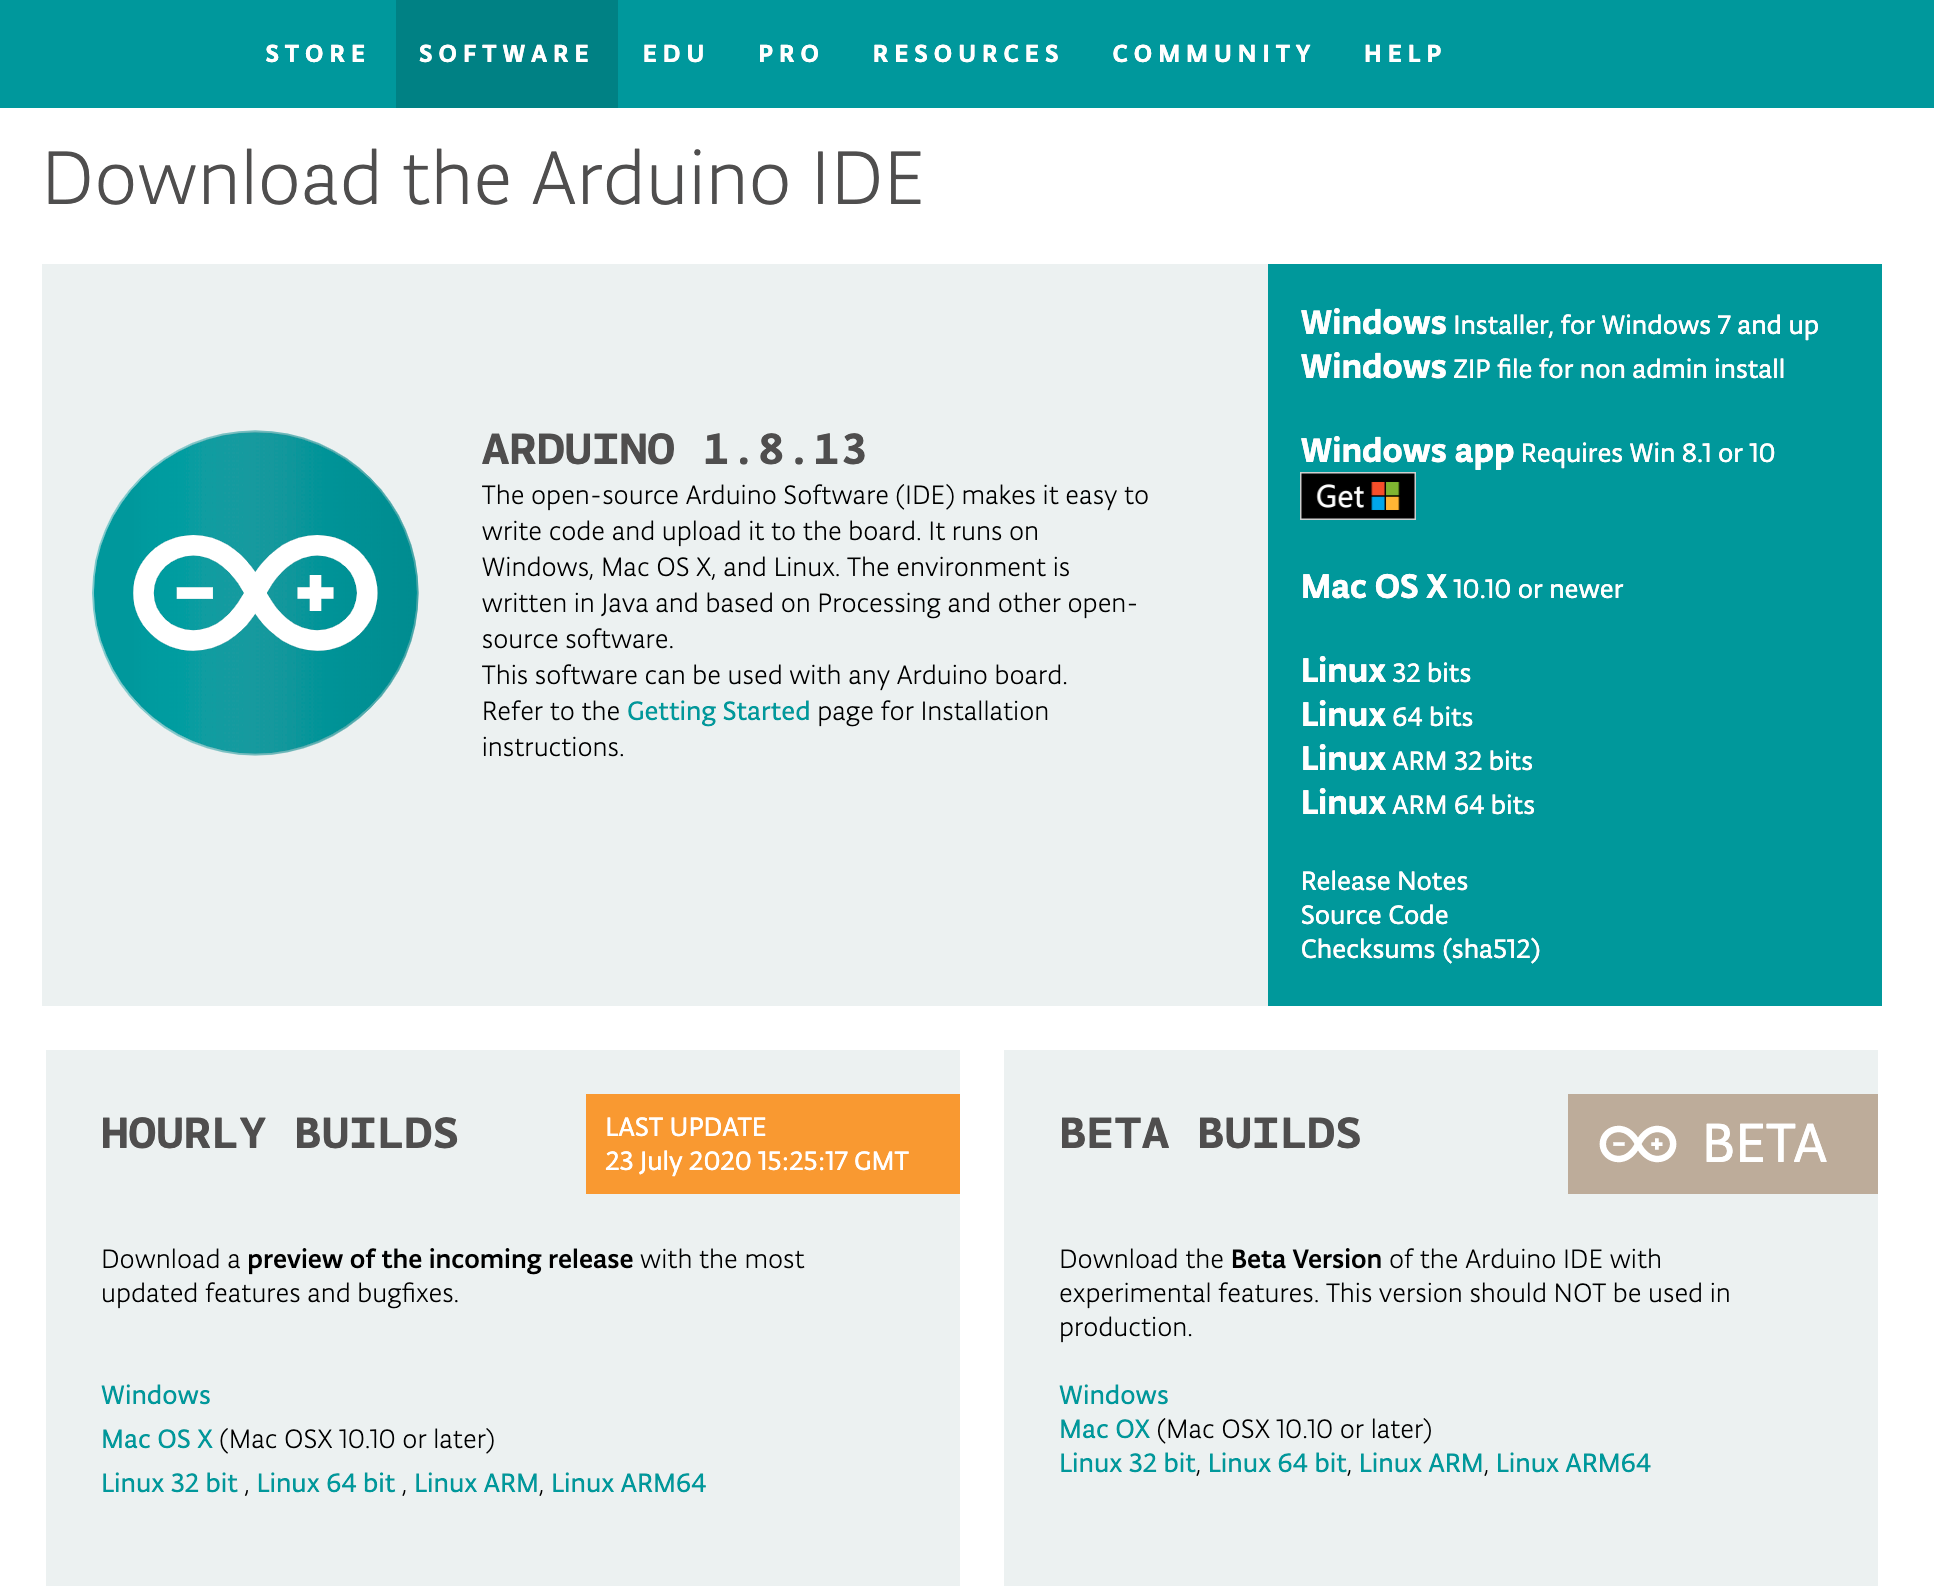
Download Arduino
Board Setup
Some boards come installed in Arduino as default. For example; the Arduino UNO
However, as you use more specialised boards you will need to install these into Arduino before using them
You will need to go to tools > board > boardManager to open the installation window.
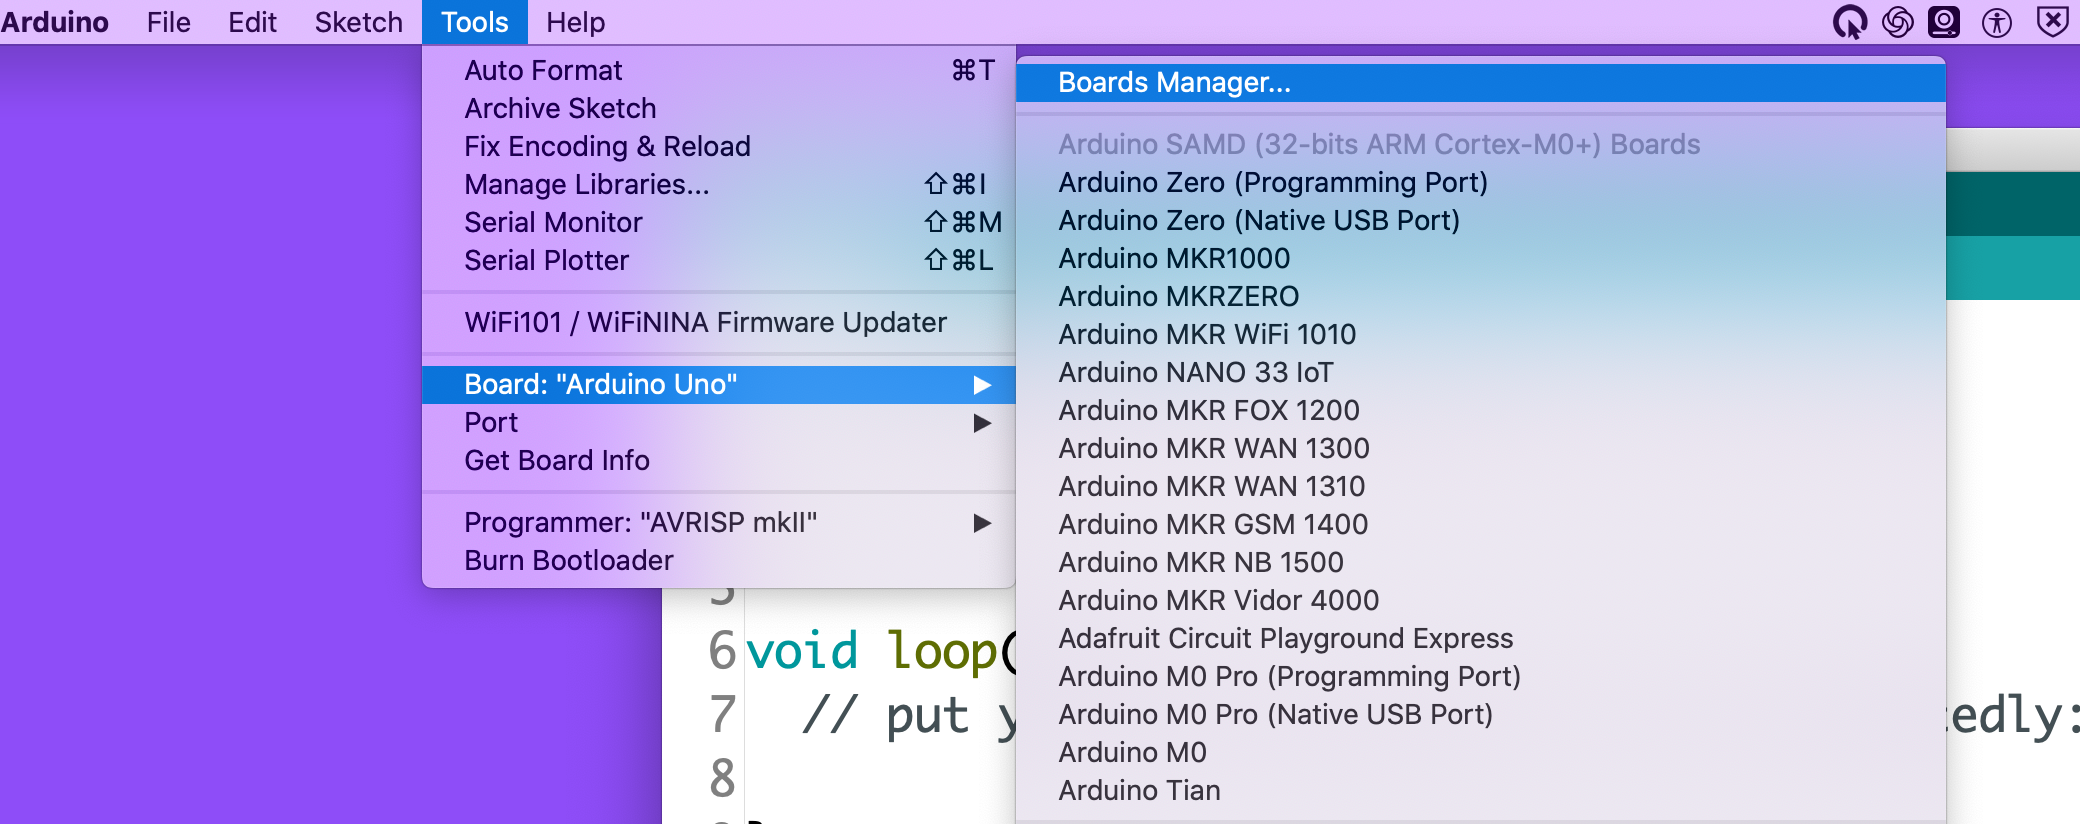
You may need to restart Arduino to see the board appear in the list.
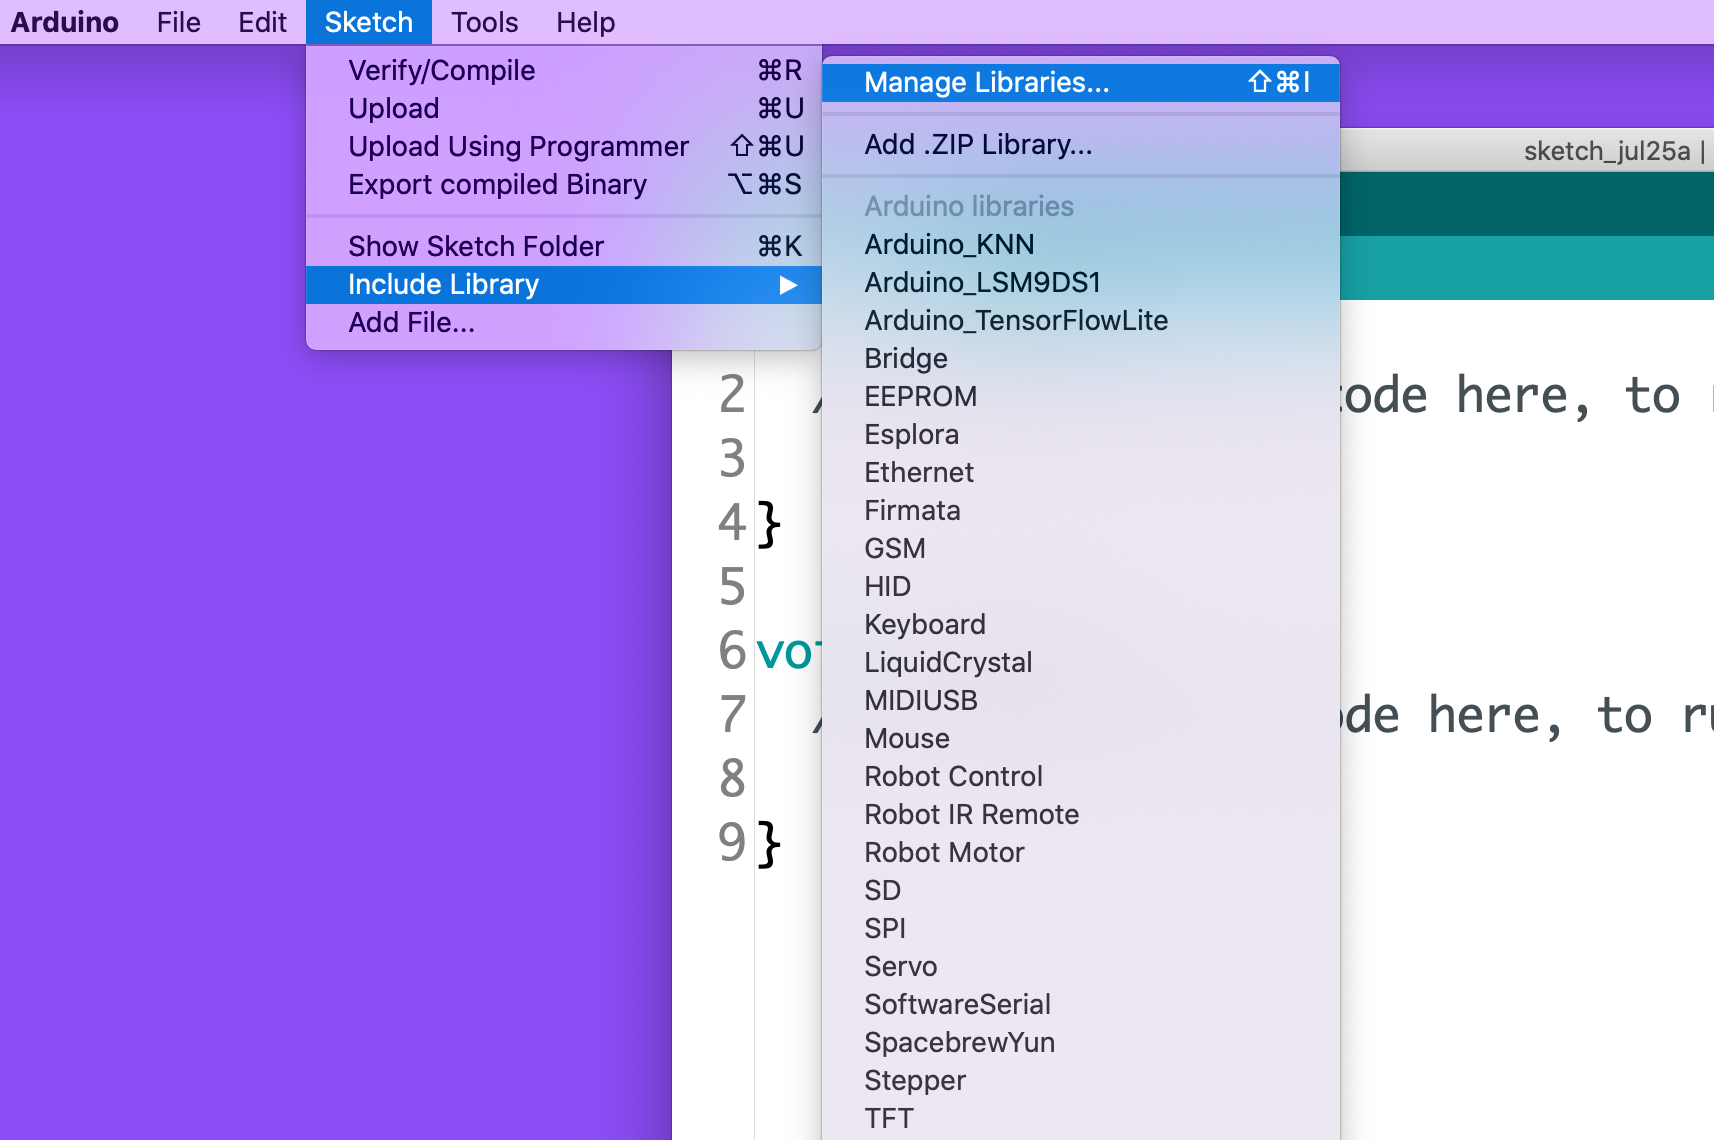
---------------------------------------------------------------------------->Libraries
In order to run specific tasks people have created some great libraries to do the heavy lifting for us.
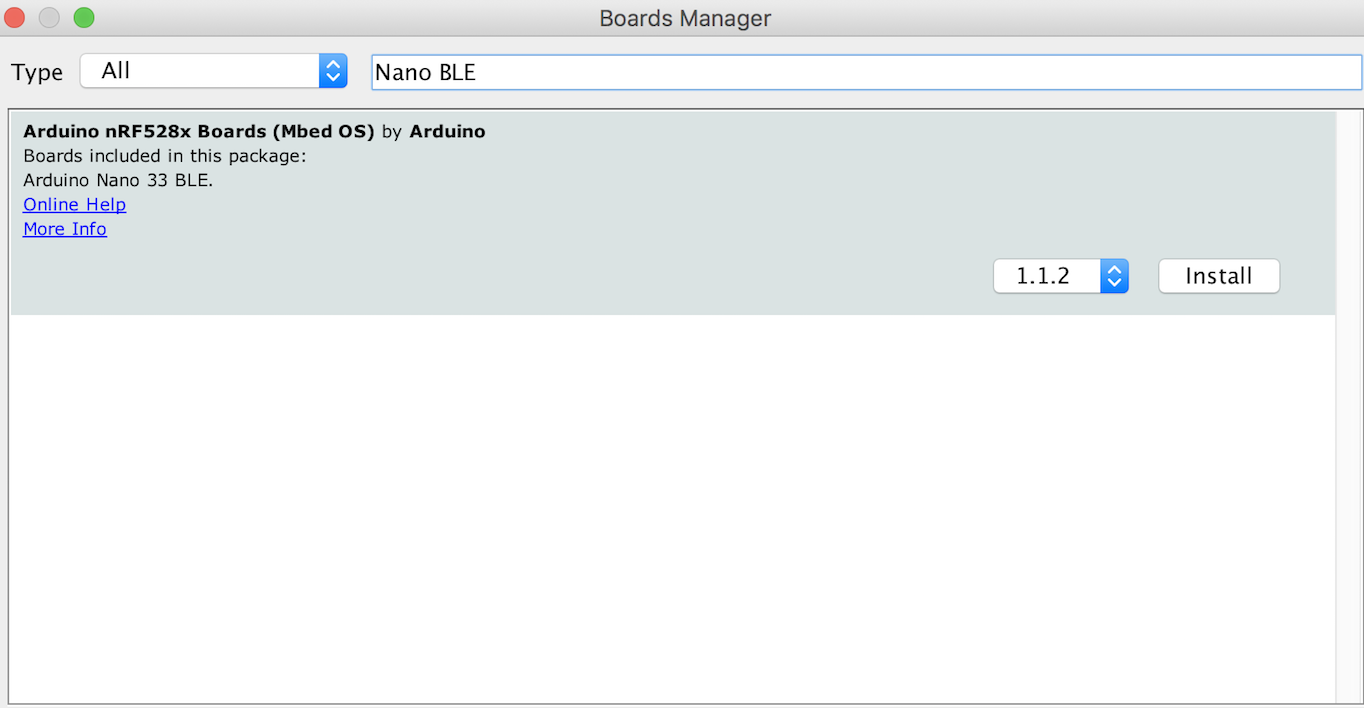
To do Machine Learning on the Arduino Nano 33 there are two key libraries you will need to install.
-
Simple KNN library
to run classification tasks
-
Arduino_LSM9DS1 library
to access the on-board IMU sensor
You can download the libraries from the above links then add them manually to the libraries folder in Arduino
However, there is an easier way!!!
You can install libraries the same way as boards via the Arduino IDE
Got to Sketch > Include Library > Manage Libraries

Board and Port Selection
In order to upload code onto a physical Arduino board you must first connect the Arduino IDE (software) to the physical board.
There are two steps involved in doing this
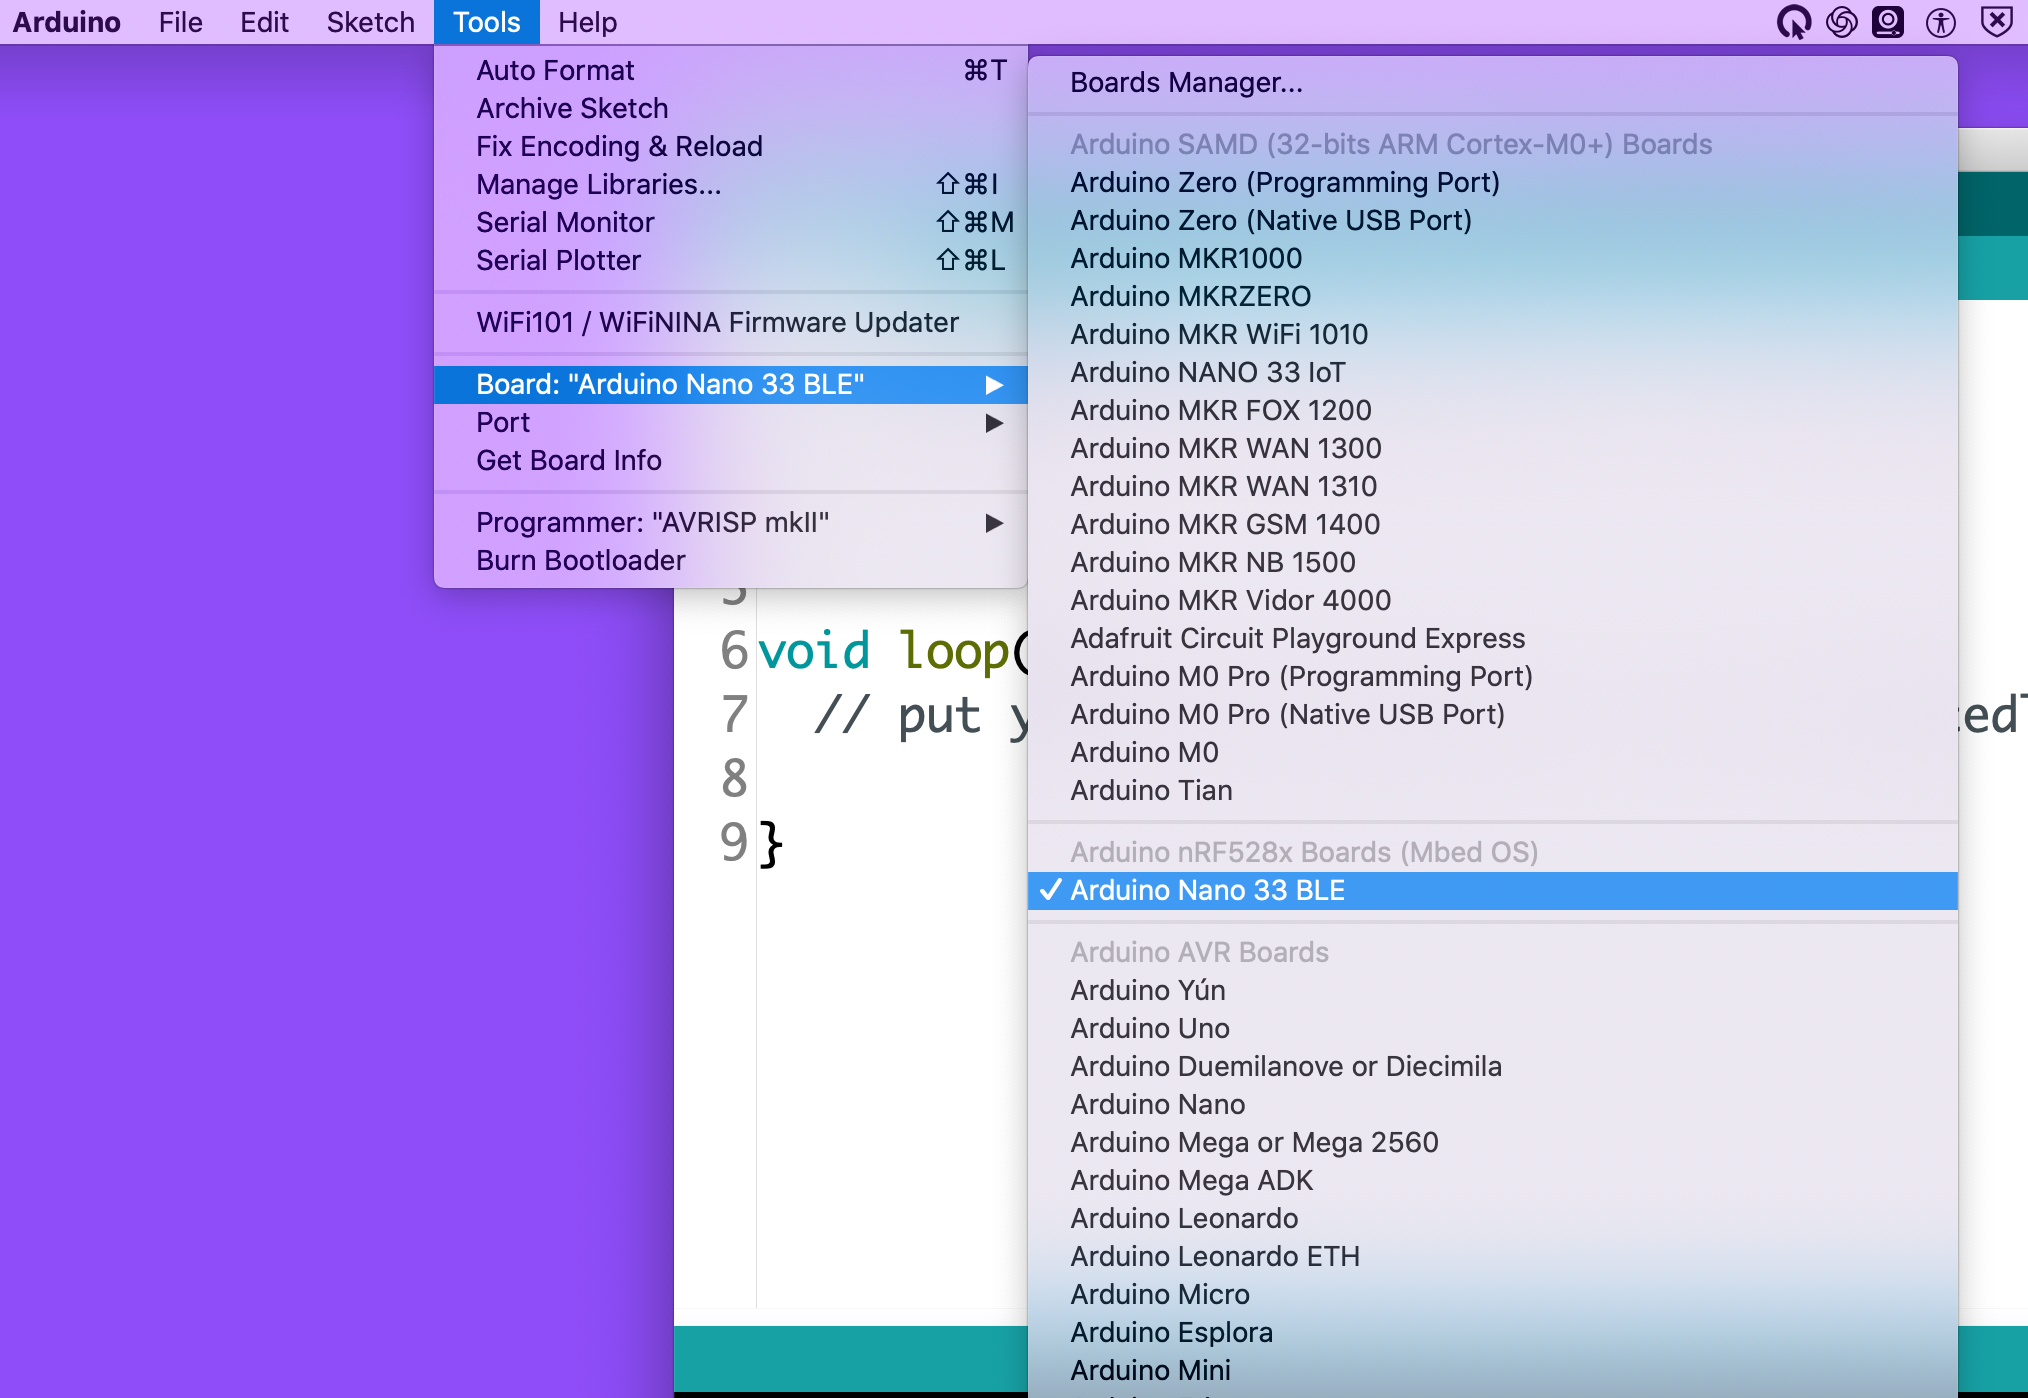
1) Select the board
We are using a specific board for our tasks. We must tell Arduino which board we are using so it compiles the code correctly.
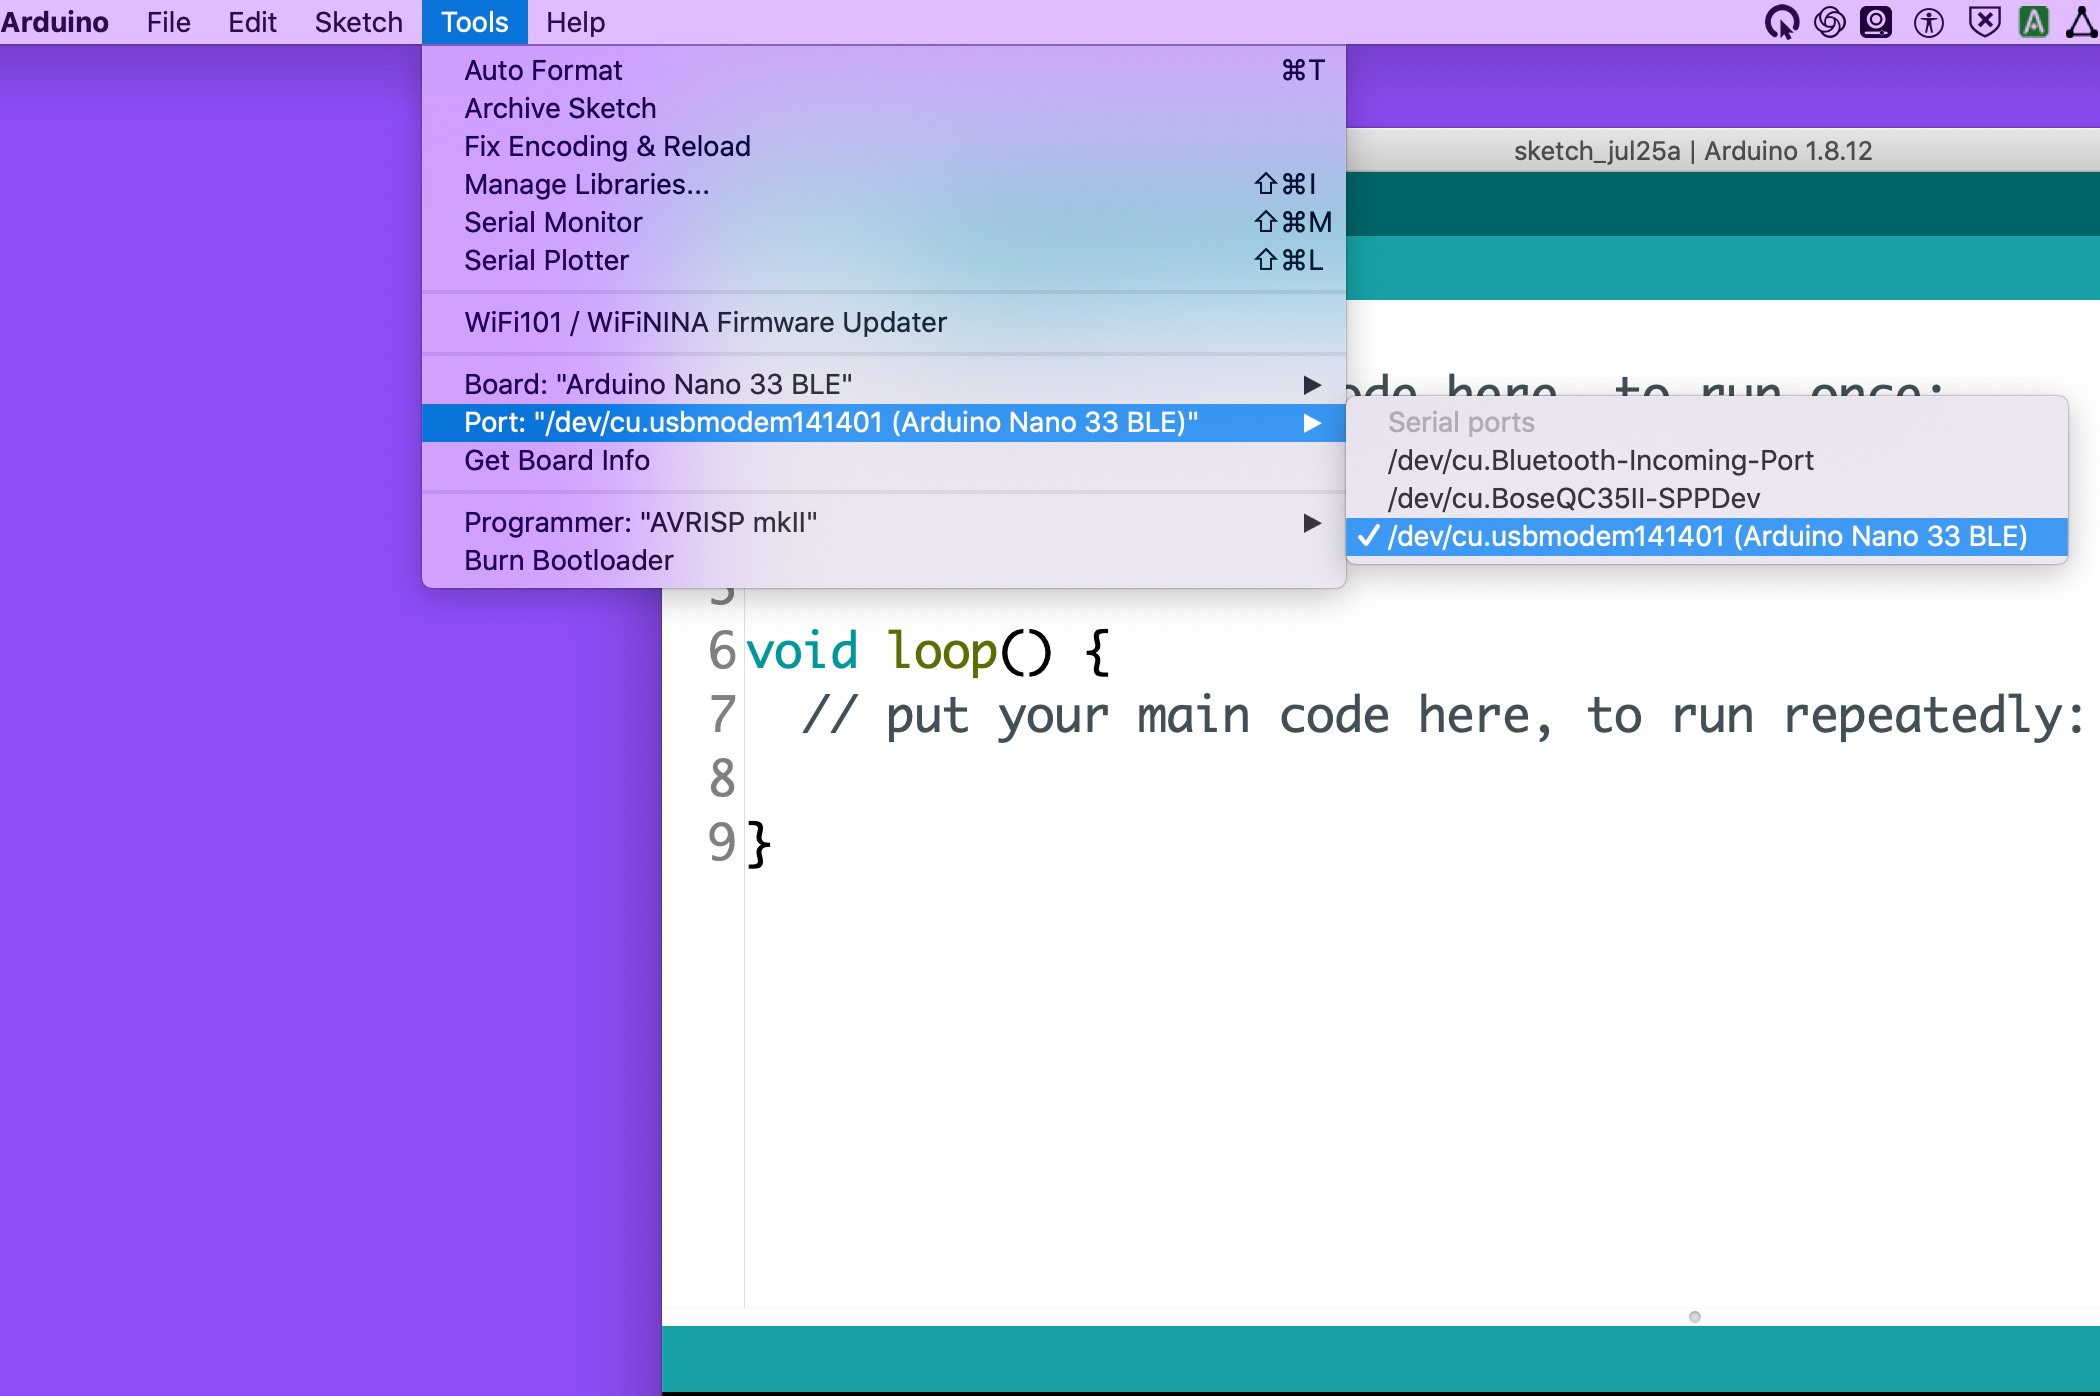
1) Select the port
The Arduino IDE needs to know where to send the code. The USB port the Arduino board is connected to must be selected so that the code goes to the correct destination.
Verify Code
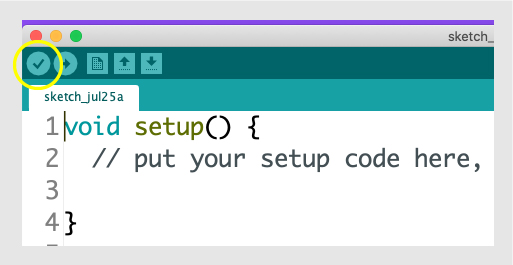
Before you upload your code it is useful to check it compiles first.
By pressing Verify you are essentially checking for any code errors such as spelling mistakes or missing libraries.
Upload Code
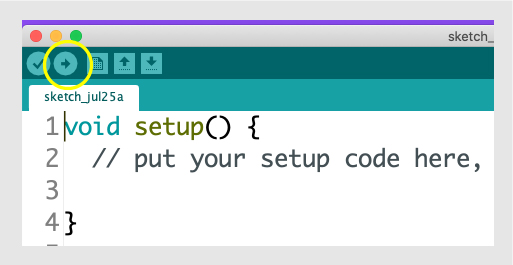
In order to transfer the code onto the physical Arduino board you must first upload it.
Making changes to the text-based code does not automatically live update the physical board. Each time you make a change you want to implement you must press the Upload button
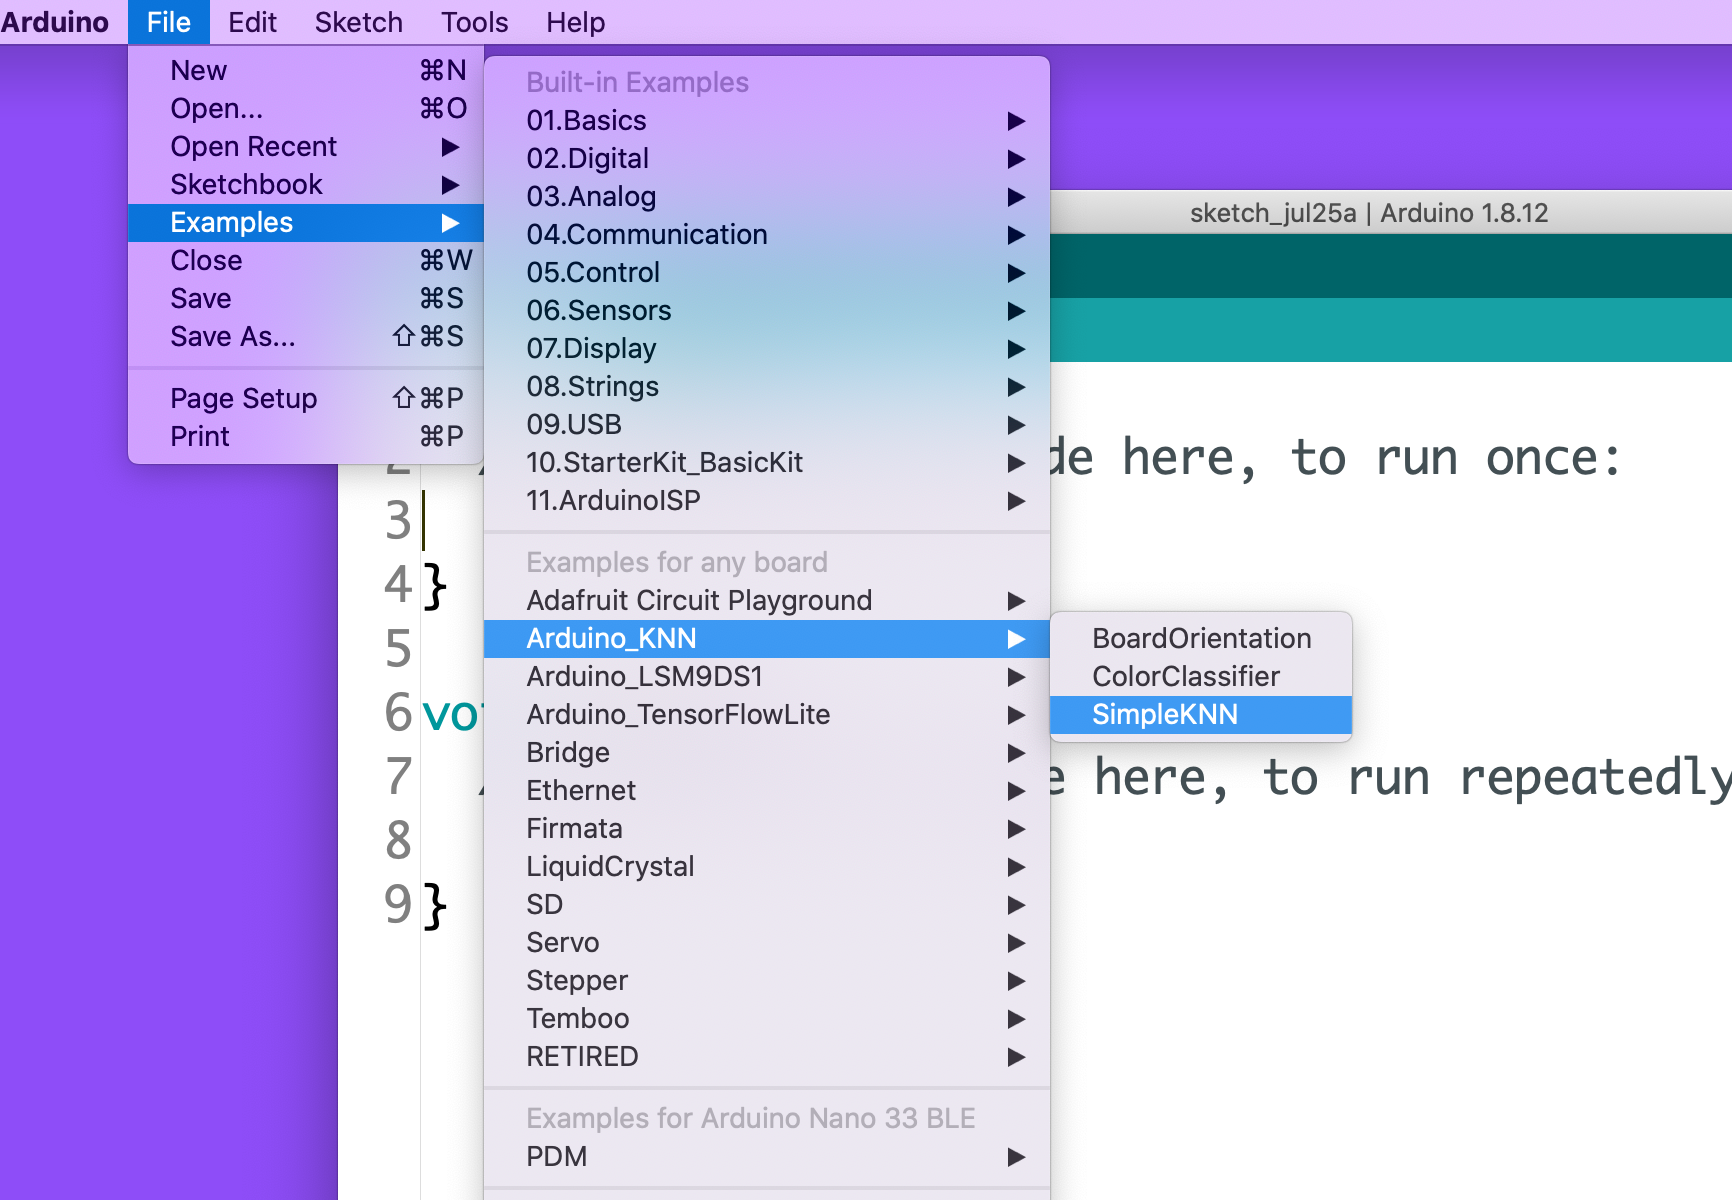
Using Examples
Usually each library you install also comes with a set of examples to help you get started.
You can find all the examples in the File tab. For example if you wanted an example in the Simple KNN library you would go to File > Examples > Arduino_KNN > Simple_KNN
Acknowledgments and References
This guide draws from the following similar instructions
---------------------------------------------------------------------------->